Quick Guide to Burn Apple Music Songs onto a CD
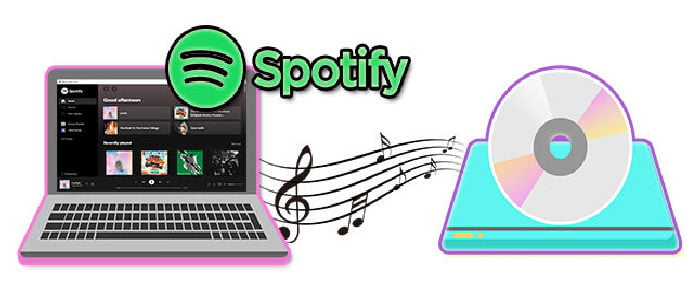
This article will guide you on how to download Apple Music songs as local files so that you can burn Apple Music songs onto a CD for playback.
Playing a CD with high-quality digital sound enriches your pastime and lets you enjoy listening to music on your lonesome. But burning and creating a personalized CD from scratch, complete with your preferred songs and playlists, is a complex task.
With millions of songs available to its subscribers, Apple Music is the world's second most popular music streaming platform, trailing only Spotify. Aside from that, Apple Music is the most commonly chosen streaming music resource for burning music to CD for most music audiophiles. But Apple Music songs are in a protected M4P format which can't be burned onto CD or downloaded locally. For this reason, if you want to copy songs from Apple Music onto a CD, you'll need an audio tool to download the Apple Music locally. Keep reading, and you'll find AudiCable Audio Recorder will be the best option.
Part 1. How to Download Songs from Apple Music
Tool Required: AudiCable Apple Music to CDs Converter
If you have purchased the music from iTunes, you’ll be able to burn them to a CD, but if you’re just streaming music online or downloading the music through the Apple Music subscription, you won’t be able to put those songs on a CD. As such, to burn Apple Music onto a CD, you should first download Apple Music songs in generic MP3 format. Luckily, AudiCable Audio Recorder is the most appropriate tool for you.
AudiCable Audio Recorder is a multi-functional audio editor and recorder for Apple Music. Equipped with an intuitive interface and professional music converting feature, AudiCable can help you save songs, albums, and playlists from Apple Music or iTunes to lossless MP3, AAC, WAV, FLAC, AIFF, or ALAC formats. The ID3 tags of your downloaded Apple Music songs stay intact, and the maximum bitrate is 3730kbps. AudiCable offers multi-platform music recording, which is ideal for fans who want access to various music resources, such as Spotify, Amazon Music, YouTube Music, and others. Check out the detailed features below.
Best Apple Music to CDs Converter (Win / Mac)
- Download music from Spotify, Apple Music, Amazon Music, Tidal, Line Music, Deezer, YouTube Music, Pandora, SoundCloud and other music sources.
- Save music to MP3, AAC, WAV, FLAC, AIFF, ALAC.
- Support to add more music websites manually.
- Keep ID3 tags after recording.
- Keep original audio quality after conversion.
- Handy tools: Format Converter, ID3 Editors, CD Burner.
📂 Tutorial on Downloading Songs from Apple Music
Step 1 Select Target Music Platform
Launch AudiCable program on your computer, and you'll see various popular streaming music platforms on the start-up interface. Choose to convert from "Apple Music" here.
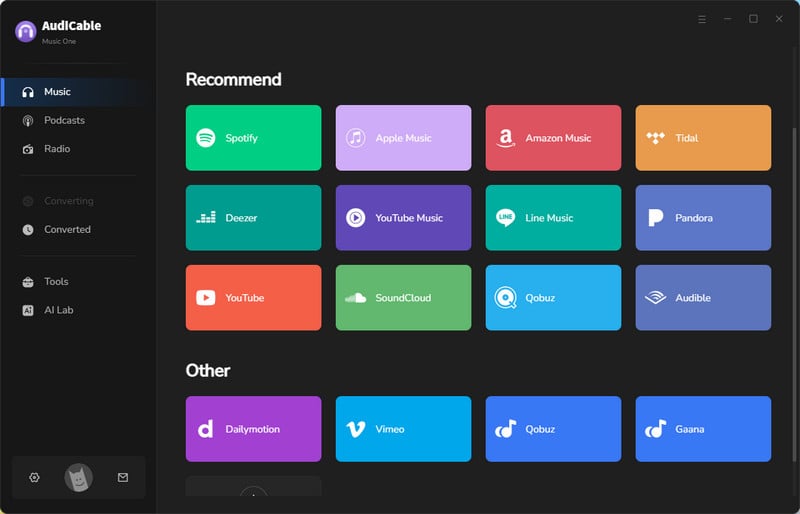
Note: To switch the convert mode for the desired music platform, just click the swapping icon on the top-right corner of the platform.
Step 2 Adjust Output Parameters
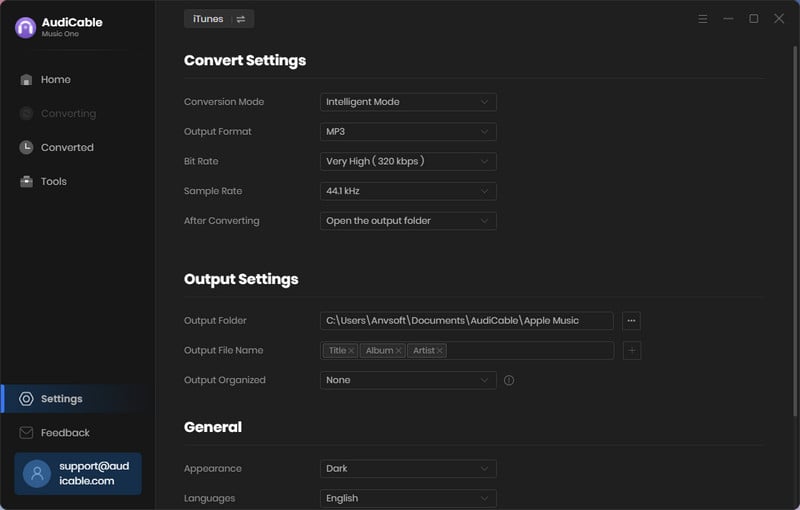
Click "Settings" in the bottom left, then select output format and other output settings. To organizing your music library, you can create a new folder to store the downloaded iTunes audio files.
Step 3 Add Apple Music to AudiCable
Click the "Add" button on the home page, then your iTunes library pops up and list all songs. Then check the songs you want to convert, and click "OK".
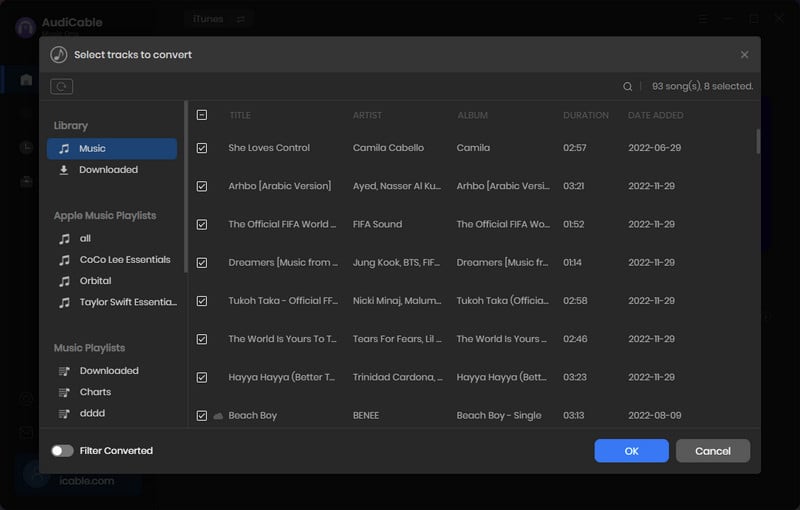
Note: If you choose to download music via the Web Download Mode, you can directly open a Apple Music playlist, album, or artist on the web player, then tap "Click to add" button to parse music.
Step 4 Begin Converting Apple Music to MP3
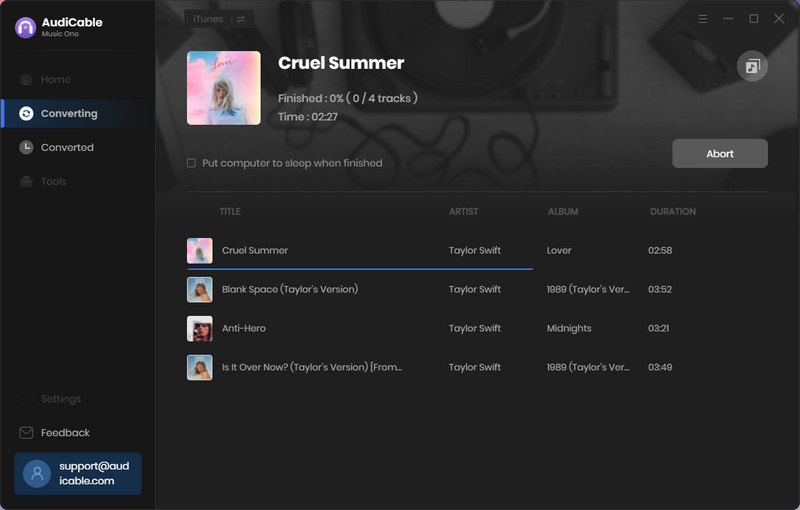
Click the "Convert" button, AudiCable will start converting Apple Music songs to the local drive. The recording process will be finished soon. If you want to stop the conversion, just click "Abort".
Step 5 Find Downloaded Apple Music on the Local Folder
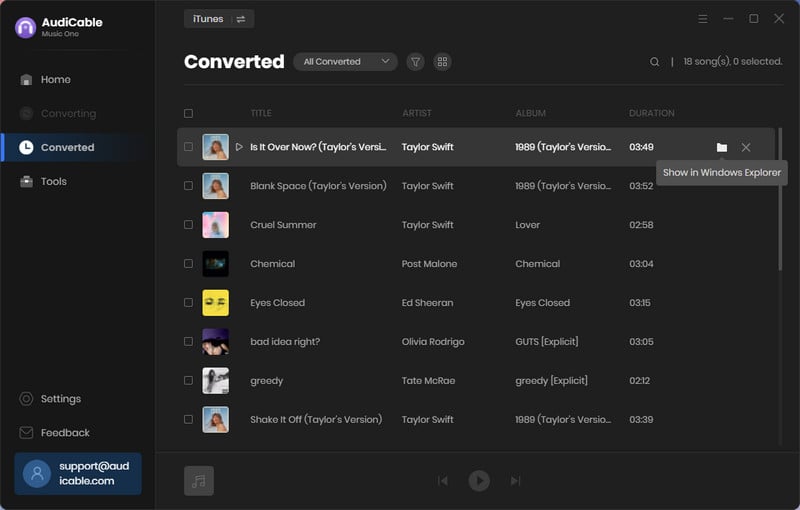
Once converted, tap "Converted" on the left tab, then click a "Folder" icon behind any song. You'll be directed to where converted Apple Music audio store.
Part 2. How to Burn Apple Music Songs onto a CD
Solution 1: Burn Apple Music Songs to CD via iTunes
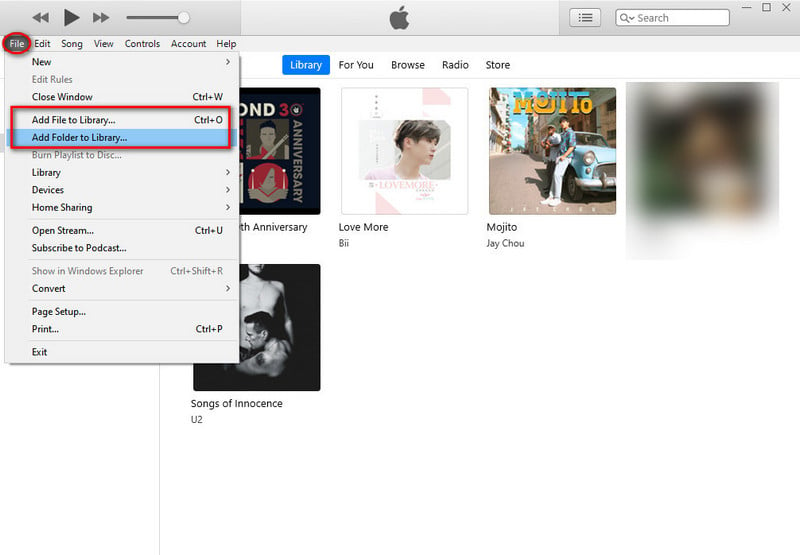
Step 1: Open iTunes on your PC & Mac, and tap "File > Add Folder to Library. Later locate the Apple Music downloads to import them to your library.
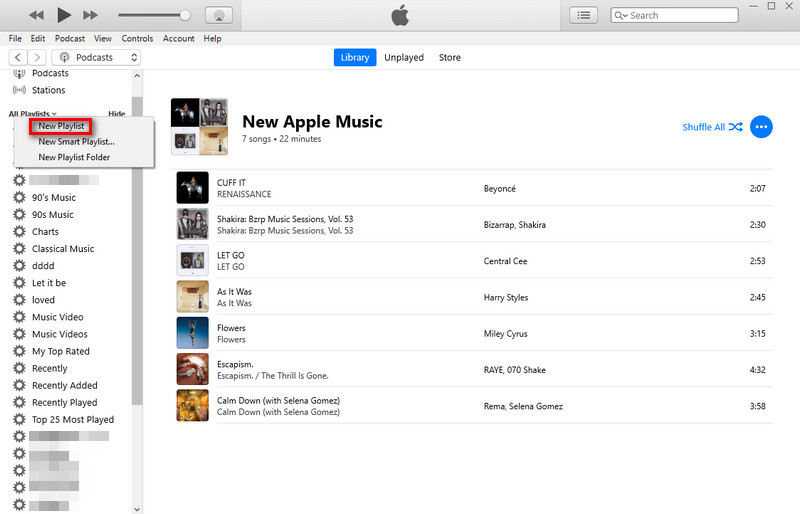
Step 2: Create a new playlist for your Apple Music, and then add the uploaded Apple Music songs to this playlist.
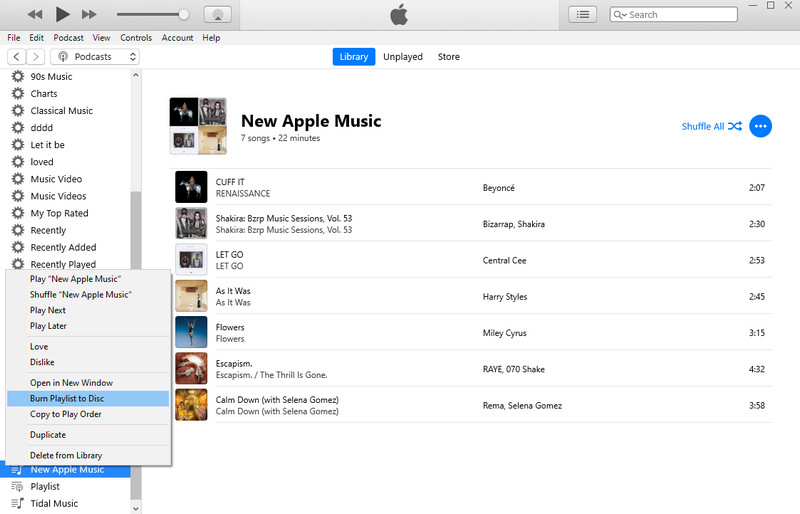
Step 3: Insert a blank CD into the disc drive of your computer. Right click to pop up "Burn Playlist to Disc...".
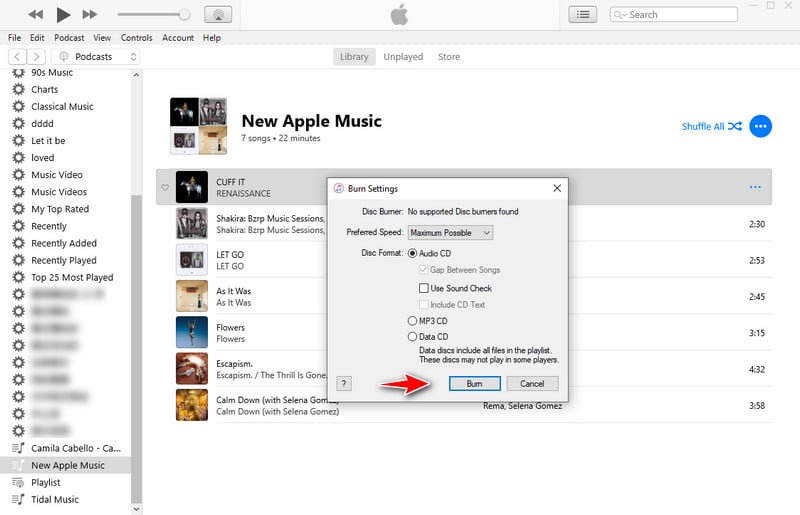
Step 4: In the pop-up new window, choose Audio CD or MP3 CD. Finally, tap the "Burn" button to start burning Apple Music songs to CD.
Solution 2: Burn Apple Music Songs onto a CD via Windows Media Player
Step 1: Launch Windows Media Player, and add the downloaded Apple Music song to the newly created playlist.
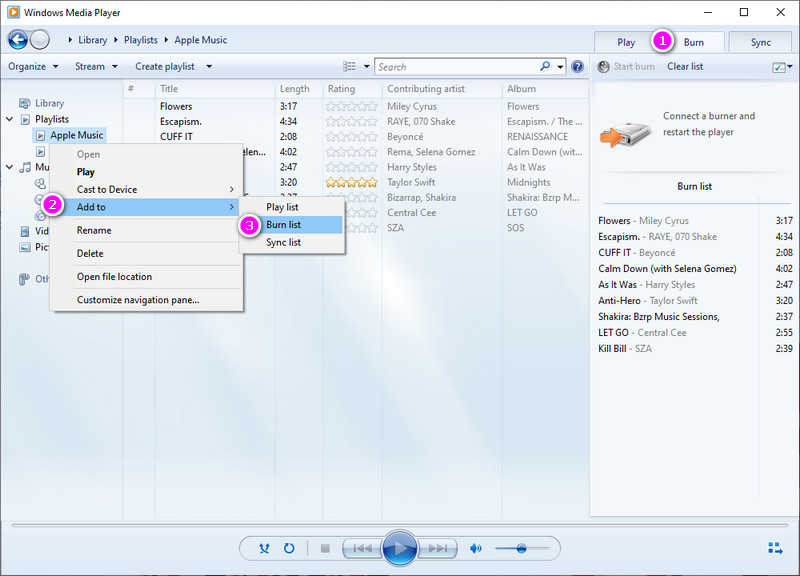
Step 2: At upper-right corner, tap "Burn", and select the song you want to copy to CD. Here you can click "Add To > Burn List" , or directly drag & drop Apple Music song to the Burn list.
Step 3: Connect a CD disk to PC, and tap "Start Burn".
Disclaimer:
- All these methods are for personal or educational use only.
- You should not use this tool to distribute music or for business.
Conclusion
It's a lot of fun to burn and create custom music CDs. With the great help of AudiCable Audio Recorder, it's easy to download Apple Music songs to CD-compatible formats like MP3, FLAC, and WAV and then burn them onto CD via iTunes or Windows Media Player. Still, hesitate? Get AudiCable and give it a spin right now!
Note: You can only convert the first 1 minute of each audio with the free trial version. Please buy the full version to unlock its limits.


